
Upgrading an entire property, from the roof down to the lawn, is one of the biggest financial decisions many homeowners ever make. Without a clear plan, costs can spiral out of control as one project uncovers another hidden issue. The key to avoiding budget blowouts is understanding each system in your home, what it typically costs to repair or replace, and where surprises tend to hide. This guide breaks down the major components of a whole property upgrade so you can plan with confidence instead of guesswork.
Planning Your Roof Replacement Budget

Your roof is one of the most expensive and most critical systems to get right during a whole property upgrade, since a mistake here can damage everything underneath it. Before collecting bids, measure your roof’s square footage and research the material options available, since asphalt shingles, metal, and tile vary enormously in price and lifespan. Getting quotes from multiple roofing contractors helps you understand the real market rate in your area rather than relying on a single estimate that could be inflated or unrealistically low.
It also pays to ask each contractor about warranty terms, underlayment quality, and how they handle unexpected decking damage discovered mid-project. Hidden rot or water damage under old shingles is one of the most common reasons roofing budgets balloon by thousands of dollars.
- Request itemized quotes that separate materials, labor, and disposal fees
- Ask about workmanship warranties separate from manufacturer warranties
- Budget an extra 10 to 15 percent contingency for decking repairs
- Confirm permit costs are included in the estimate
Choosing the Right Heating and Cooling Systems

Climate control is another major line item, and homeowners are often surprised by how much system sizing affects both upfront cost and long-term efficiency. A unit that is too large or too small for your square footage will cost more to run and wear out faster, so proper load calculations matter more than brand names. When budgeting for AC installation, get at least three quotes and ask each contractor to walk you through their sizing math rather than just naming a price.
Energy efficiency ratings also affect your return on investment over time, so it is worth comparing higher upfront costs against projected utility savings. Many homeowners find that spending slightly more on a higher SEER-rated system pays for itself within five to seven years through lower monthly bills.
- Ask for a Manual J load calculation before accepting a bid
- Compare SEER ratings and projected annual energy costs
- Check whether ductwork needs repair or replacement as part of the job
- Ask about rebates for energy efficient equipment
Keeping Your Existing Equipment Running Longer

Not every upgrade means total replacement, and sometimes the smartest budget move is extending the life of what you already have. Scheduling heating repair before a full system failure can save thousands compared to emergency replacement during the coldest week of the year. A seasonal inspection often catches small issues, like a failing igniter or a clogged filter, before they turn into costly breakdowns.
Keeping records of past repairs also helps you make a more informed decision about whether to patch an aging system or budget for replacement sooner rather than later. If a unit has needed three or more major repairs in two years, that is usually a sign replacement will be more cost effective long term.
- Schedule inspections in spring and fall before peak usage seasons
- Keep a maintenance log to track recurring issues
- Compare the cost of recent repairs against the price of a new unit
- Ask technicians for an honest repair-versus-replace recommendation
Understanding Septic and Drainage System Costs
Underground systems are easy to forget during a whole property upgrade because they are invisible until something goes wrong. If your property relies on a septic system, drain field installation can be one of the costliest surprises homeowners face, often running into five figures depending on soil conditions and local permitting requirements. Soil percolation tests are usually required before installation begins, and failing soil can mean additional engineering costs.
Getting a septic inspection early in your planning process, rather than after other renovations are underway, gives you a realistic picture of what lies ahead financially. It is far better to discover a failing drain field before you have already spent your renovation budget on cosmetic upgrades.
- Schedule a septic inspection before finalizing your overall budget
- Ask about soil testing requirements in your municipality
- Request a written estimate that includes permitting and inspection fees
- Set aside a separate contingency fund for underground system repairs
Maintaining Curb Appeal Without Overspending
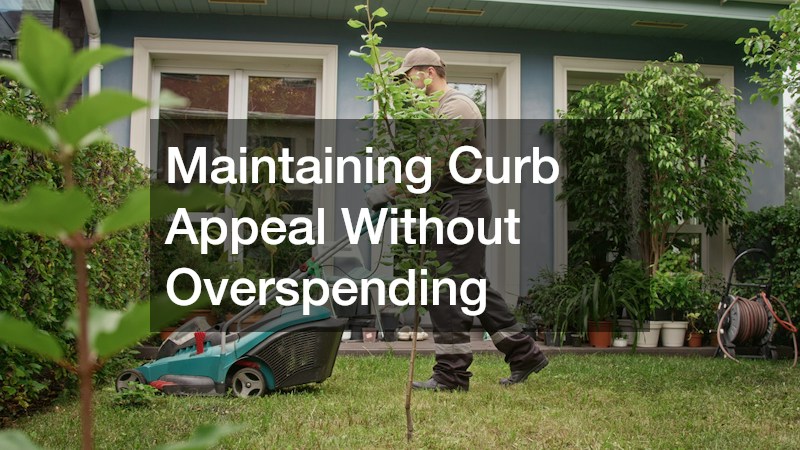
Landscaping is often treated as an afterthought, but it can quietly consume a large chunk of a property upgrade budget if left unplanned. Hiring lawn care services for regular mowing, fertilization, and seasonal cleanup is usually far more affordable than letting a yard fall into disrepair and needing a full landscape overhaul later. Getting a seasonal service contract can also lock in predictable pricing instead of paying premium rates for one-off visits.
Fresh mulch is one of the most cost-effective ways to instantly improve a property’s appearance while also protecting plant beds from weeds and moisture loss. A few cubic yards spread around trees, shrubs, and garden beds can transform curb appeal for a relatively small investment compared to other landscaping upgrades.
- Compare per-visit pricing against seasonal contract rates
- Ask providers what is included, such as edging, aeration, or weed control
- Reapply mulch annually to maintain moisture retention and appearance
- Choose mulch types based on climate and soil needs
Adding Living Space With a Sunroom
If part of your property upgrade includes expanding usable square footage, sunrooms offer one of the better returns compared to a full home addition. Because they typically use lighter framing and simpler foundation work than a traditional room addition, the overall cost per square foot tends to be lower while still adding genuine living space. Homeowners should still budget for proper insulation and HVAC extension if the space will be used year-round rather than seasonally.
Permitting requirements vary significantly by municipality, so it is worth checking local codes before finalizing design plans. Getting at least two contractor bids for a sunroom project helps you compare not just price but also material quality, window efficiency, and structural warranty terms.
- Decide whether the space will be three-season or fully climate controlled
- Ask about insulated glass options to reduce energy loss
- Confirm foundation requirements with your local building department
- Compare warranty coverage between contractors
Installing Fencing for Privacy and Property Value
Fencing is another upgrade that homeowners often underestimate, both in cost and in the decision-making process around materials. Vinyl fences have become a popular choice because they require far less long-term maintenance than wood, never need repainting, and tend to hold up better against moisture and pests over time. While the upfront material cost is often higher than wood, the reduced maintenance expense over a ten-year period frequently makes it the more economical choice.
Before installing any fence, check with your local utility companies to have underground lines marked, and confirm property lines with a survey if you have any uncertainty. Skipping this step is one of the most common causes of unexpected costs, including fines or the need to relocate posts after installation has already begun.
- Request a utility line marking before digging begins
- Confirm property boundaries with a recent survey
- Compare long-term maintenance costs, not just upfront material price
- Ask about warranty coverage for fading or cracking
Hiring the Right Roofing Professionals for the Job
Beyond getting quotes, the process of actually selecting roofers deserves its own line item in your planning, since the cheapest bid is not always the best value. Checking licensing, insurance, and local references can prevent costly disputes later if work is substandard or if an injury occurs on your property during the job. Reading recent customer reviews, rather than relying solely on a company’s own testimonials, gives a more balanced view of what to expect.
It is also worth asking how a company handles cleanup and disposal of old materials, since unexpected dumping fees are sometimes added after the fact if not clarified upfront. A detailed written contract protects both parties and should outline start dates, payment schedules, and what happens if weather delays the project.
- Verify active licensing and liability insurance before signing a contract
- Ask for local references from jobs completed in the past year
- Clarify cleanup and material disposal responsibilities in writing
- Confirm payment schedules tied to project milestones rather than full upfront payment
Budgeting for Emergency Repairs Mid-Project
Even with careful planning, unexpected breakdowns can happen while a larger renovation is underway, particularly with older homes where systems are interconnected. Tearing into walls or flooring often exposes outdated wiring, corroded pipes, or failing HVAC components that nobody knew about until the work began. Needing AC repairs during a summer renovation, for example, can strain a budget that was already allocated toward other upgrades, especially if the unit needs replacing entirely rather than a simple fix. A good rule of thumb is to set aside 10-20% of your total renovation budget specifically for emergencies, with older homes warranting the higher end of that range. This money should sit in a separate account or fund, untouched unless a genuine problem arises, so you’re not tempted to dip into it for upgrades or finishes that weren’t part of the original plan. It also helps to prioritize which systems are most likely to fail based on the age of your home. A furnace or AC unit over 15 years old, galvanized plumbing, or an outdated electrical panel are all common culprits that can turn into mid-project emergencies. Knowing these risk points ahead of time lets you budget more realistically and avoid being blindsided when a contractor flags an issue. Finally, keep a short list of trusted, licensed professionals you can call on short notice, whether for plumbing, electrical, or AC repairs. Having these contacts ready before a crisis hits saves time, reduces stress, and often results in fairer pricing than scrambling to find help during an emergency.
A good rule of thumb is reserving 10 to 20 percent of your total project budget specifically for unplanned repairs across all systems, not just one. Older homes or properties with outdated electrical, plumbing, or structural components should lean toward the higher end of that range, since hidden problems become more likely once walls, floors, or ceilings are opened up. This buffer gives you flexibility to address urgent issues immediately rather than delaying other contractors while you scramble to find additional funds. For example, if a renovation crew discovers water damage or faulty wiring behind a wall, having reserved funds means work can continue without a multi-week pause to secure financing or get quotes from new specialists. It also helps to break your contingency fund into rough categories tied to the systems most likely to surprise you — plumbing, electrical, foundation, and roofing are common culprits. Even a loose allocation, like setting aside a larger share for a 1960s-era home’s wiring versus a newer build, helps you anticipate where the money is most likely to go. Finally, treat this reserve as untouchable for non-emergency upgrades or design changes. It’s tempting to dip into it for a nicer countertop or upgraded fixtures, but doing so leaves you exposed exactly when you need the cushion most.
- Set aside 10 to 20 percent of total budget as a contingency reserve, leaning toward 20 percent for older homes or properties with unknown structural, electrical, or plumbing conditions
- Keep emergency funds in a separate account to avoid accidental spending, and treat it as untouchable unless a true mid-project issue arises
- Prioritize safety-related repairs over cosmetic ones if funds are tight — things like faulty wiring, mold, or structural damage should always come before finishes or decor
- Get a quick second quote for any surprise repair over a few hundred dollars so you’re not overpaying out of urgency
- Revisit your contingency fund after each completed project phase, adjusting the remaining reserve based on what’s left and what risks are still ahead
- If a phase finishes under budget, consider rolling the savings into the contingency fund rather than spending it elsewhere
A whole property upgrade touches nearly every system in and around your home, which means surprises are almost inevitable unless you plan for them ahead of time. By researching costs, getting multiple quotes, and setting aside a realistic contingency fund, you put yourself in control of the process rather than reacting to it. Start by prioritizing the systems most likely to cause bigger problems if ignored, then work outward toward cosmetic improvements. With a clear budget and the right professionals at each stage, you can complete your upgrade confidently and without the financial stress that so often catches homeowners off guard.
About the Author