
Transforming a residential property through a full or partial renovation is one of the most rewarding endeavors a homeowner can undertake. Beyond increasing the financial equity and market appeal of your residence, a well-executed remodel aligns your living environment with your day-to-day lifestyle, improving comfort, spatial functionality, and energy efficiency. However, without a disciplined plan, the renovation process can quickly become overwhelming, characterized by budget overruns, trade scheduling conflicts, and unexpected structural surprises.
A successful home renovation is not born from impulsive design choices or rushing directly into demolition. Instead, it relies on a structured, phase-by-phase framework that prioritizes thorough research, structural integrity, trade coordination, and meticulous material selection. By taking a systematic approach to planning—moving methodically from initial scope definition down to the final protective surface coatings—you can maintain complete control over your timeline and budget while ensuring exceptional craftsmanship.
Phase 1: Defining Scope, Establishing Budgets, and Sourcing Trade Specialists

Mapping Needs Versus Wants to Set Realistic Spending Limits
The first step in any home improvement project is conducting a comprehensive room-by-room audit of your property. Walk through each living zone with a notebook and critically assess its functional shortcomings, structural condition, and aesthetic defects. It is essential to categorize your project goals into absolute necessities—such as fixing a sagging subfloor, replacing an aging roof, or addressing drafty windows—versus cosmetic desires like upgraded kitchen backsplashes or custom accent walls.
Once you have established your core scope, develop a realistic project budget that reflects current material costs and trade labor rates. Always allocate a dedicated contingency reserve of 15% to 20% of your total budget. This financial cushion protects your project when opening up old walls or lifting worn flooring uncovers hidden electrical hazards, compromised framing, or moisture damage that must be rectified before proceeding.
Vetting Contractors and Evaluating Local Product Suppliers
Bringing a complex renovation vision to life requires assembling a reliable team of licensed trade professionals and identifying reputable material vendors. Take time to check contractor licenses, verify general liability and worker’s compensation insurance coverage, and speak directly with past clients regarding work quality and adherence to schedules.
In addition to hiring skilled labor, sourcing your materials through specialized local vendors ensures higher product quality and reliable delivery timelines:
-
Physical Product Testing: Visiting a trusted local flooring company allows you to touch material samples, test surface textures, and verify lead times directly with knowledgeable specialists.
-
Warranty Verification: Local suppliers provide clear guidance on manufacturer warranties and offer post-purchase support that large online retailers often lack.
-
Trade Recommendations: Established product suppliers frequently maintain strong professional networks and can recommend vetted, licensed installers tailored to your specific project needs.
Phase 2: Structural Integrity, Exterior Envelope, and Weatherproofing
Inspecting the Roofline and Overhead Protection Systems
Before investing time and financial resources into interior finishes, you must ensure that your home’s exterior shell is completely watertight and structurally sound. Installing brand-new drywall, high-end cabinetry, or premium flooring beneath an unverified roof system risks catastrophic water damage during the first severe storm.
Carefully inspect your attic space for telltale signs of moisture intrusion, such as water staining on roof rafters, damp insulation, or mold growth along ceiling joists. On the exterior, look for missing or curling shingles, rusted flashing around chimneys, and sagging gutter lines. Scheduling necessary residential roof repairs guarantees that your newly renovated interior living spaces remain fully protected from overhead leaks and moisture degradation for years to come.
Restoring Window Seals, Frames, and Specialty Glazing
Windows play a dual role in your home’s building envelope, serving as both a primary barrier against weather intrusion and a key contributor to energy efficiency and natural lighting. Aging window assemblies with rotted wooden sills, cracked glass panes, or broken thermal seals allow conditioned indoor air to escape while drawing unwanted moisture into exterior wall cavities.
Restoring your window systems requires addressing both structural frames and specialized glass elements:
-
Frame and Seal Restoration: Executing targeted window repairs seals air leaks, restores smooth sash operation, and replaces deteriorating wood components before moisture spreads into surrounding wall studs.
-
Thermal Efficiency Upgrades: Replacing single-pane units or fogged double-pane glass with modern Low-E thermal units significantly reduces heating and cooling costs.
-
Custom Glass Installation: Partnering with a skilled glass installer allows you to safely fit specialized architectural features, such as frameless glass shower enclosures, custom mirrored walls, or oversized picture windows that maximize natural daylight.
Phase 3: Interior Flooring Selection and Surface Preparation
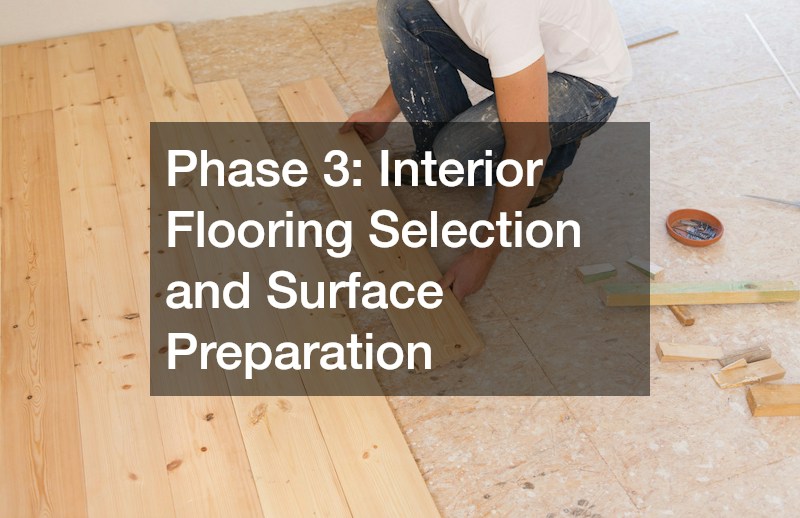
Comparing Durable Materials for High-Traffic Living Zones
Flooring serves as the foundational visual element of your home’s interior architecture, enduring daily foot traffic, furniture movement, and accidental spills. Selecting the right floor covering requires balancing stylistic preferences with the practical demands of each specific room.
When evaluating material options, take time to visit regional flooring stores to compare full-scale floor planks and tile displays under realistic lighting:
-
Solid Hardwood: Delivers timeless aesthetic warmth and can be refinished multiple times, making it ideal for primary living rooms and dining areas.
-
Luxury Vinyl Plank (LVP): Offers exceptional water resistance and durability, making it an outstanding choice for basements, kitchens, and homes with pets.
-
Porcelain and Ceramic Tile: Provides superior stain and moisture protection for heavy-use bathrooms and entryway foyers.
Upgrading Foundation Surfaces Across Living and Utility Areas
Proper surface preparation is the single most critical factor in determining the longevity and appearance of new floor coverings. Laying expensive hardwood, tile, or vinyl over an unlevel, cracked, or damp subfloor will inevitably lead to squeaking boards, cracked grout lines, and premature floor failure.
Thoroughly inspect wooden subfloors for structural deflection, popping nails, or water rot, replacing compromised sheathing panels as needed. For ground-level concrete slabs, conduct moisture emission tests and use self-levelling underlayment compounds to eliminate low spots. Installing high-quality residential floors over a properly prepared, level subfloor ensures a flawless finish and quiet, comfortable performance underfoot.
Phase 4: High-Performance Coatings and Specialty Surface Protection
Applying Heavy-Duty Sealants to Garages, Basements, and Utility Spaces
Garages, workshop areas, and basement utility rooms demand specialized surface treatments capable of handling heavy physical impacts, vehicle traffic, chemical spills, and continuous moisture vapor. Standard concrete slabs are inherently porous, leaving them vulnerable to oil staining, dusting, and spalling if left unsealed.
To transform utilitarian concrete slabs into durable, low-maintenance work surfaces, resinous surface coatings offer an ideal solution. Preparing the concrete through mechanical diamond grinding or shot-blasting opens the pores of the slab, ensuring that applied epoxy floor coatings form an unbreakable chemical bond with the substrate. These continuous coatings seal out moisture, resist tire marks, and create a smooth, stain-proof surface that wipes clean effortlessly.
Protecting Interior and Exterior Slabs with Resinous Barriers
Extending high-performance protective coatings to secondary concrete zones—such as covered patios, laundry rooms, and basement living spaces—further guards your home against ground-level moisture migration.
Investing in professionally applied residential floor coatings offers several distinct advantages for heavy-use areas:
-
Seamless Moisture Protection: Creates a continuous vapor barrier that prevents ground moisture from rising through the slab and damaging interior furnishings.
-
Enhanced Chemical and Stain Resistance: Shields concrete against harsh household cleaners, automotive fluids, road salts, and pet accidents.
-
Improved Safety and Visibility: High-gloss reflective finishes improve interior light levels, while incorporated anti-slip aggregates provide extra traction under wet conditions.
Phase 5: Palette Selection, Paint Sourcing, and Final Wall Detailing
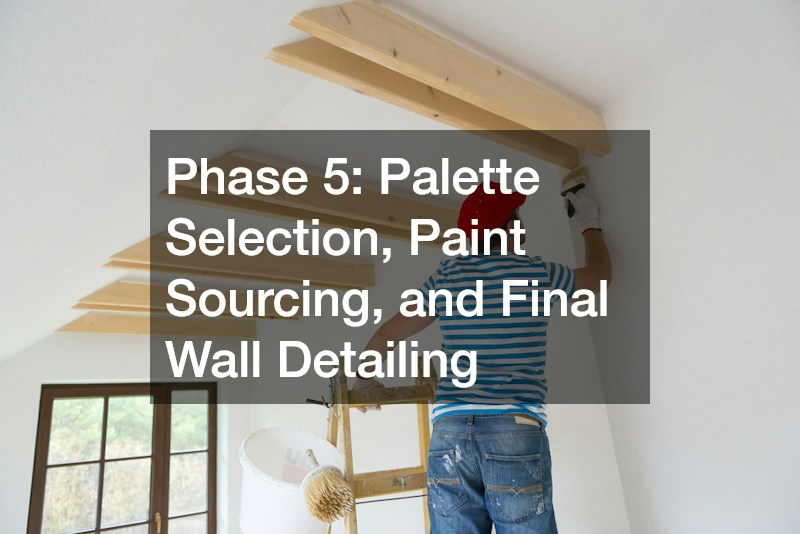
Testing Sheens and Gathering High-Quality Architectural Coatings
The final phase of a home renovation brings the visual design together through color and surface texture. Painting is one of the most cost-effective ways to redefine a space, but achieving professional-grade results requires selecting the proper paint sheens and using high-quality application tools.
When selecting paint finishes, match the sheen level to the functional demands of the room:
-
Flat / Matte: Excellent for concealing wall imperfections in low-traffic bedrooms and ceiling planes.
-
Eggshell and Satin: Offer a gentle sheen with excellent scrubbability, making them perfect for family rooms, hallways, and living areas.
-
Semi-Gloss: Highly resistant to moisture and grease, making it the ideal choice for kitchen walls, bathroom surfaces, baseboards, and interior door trim.
To ensure crisp lines and smooth coverage, source professional-grade synthetic bristle brushes, high-density roller covers, surface primers, and premium painter’s tape from a dedicated paint supply store.
Sourcing Premium Color Formulas for Lasting Interior Visual Appeal
Color perception changes dramatically based on natural sunlight exposure, room orientation, and the color temperature of artificial light fixtures. Before committing to painting entire rooms, purchase small color sample pots and paint large test swatches directly on multiple walls to observe how the color transforms throughout the day.
For superior color depth, exceptional coverage, and long-lasting durability, visit an authorized benjamin moore store to explore curated color collections and specialized paint formulas. High-grade interior paints contain premium resins and pigments that resist fading, withstand frequent washing, and deliver a smooth, luxurious finish that highlights your newly renovated home.
Phase 6: Coordinating Structural Subfloor Prep and Sub-Surface Inspections
Leveling Sagging Joists and Testing Subfloor Moisture Emissions
Before laying down new tile, hardwood, or resilient flooring across your home, the underlying subfloor assembly must undergo thorough structural evaluation. Over decades, joists settle, wood sheathing suffers concealed moisture degradation, and concrete slabs develop minor cracking or unevenness that will quickly ruin new floor finishes.
Inspect wooden subfloors for structural deflection, loose fasteners, or rotted panels, replacing damaged plywood sheets and sistering bowed joists where needed. For concrete ground slabs, perform standardized calcium chloride or relative humidity tests to measure moisture vapor emission rates before installation. Addressing underlying floor levelness and moisture barriers prevents tile grout cracking, plank buckling, and adhesive failures in your newly installed residential floors.
Preparing Ground Slabs for Resinous and Protective Finishes
Concrete slabs located in basements, garages, and utility areas require specialized mechanical preparation before any high-performance sealants or surface coatings can be applied. Simply washing or sweeping a smooth concrete floor is insufficient, as unground slabs retain laitance and surface sealers that prevent proper chemical adhesion.
Working with experienced technicians to perform diamond grinding or shot-blasting opens the concrete’s porous structure, ensuring that specialized residential floor coatings form a permanent bond with the substrate. Proper surface profiling guarantees that protective barriers resist hot-tire pickup, chemical spills, and heavy foot traffic, turning utilitarian concrete into an easy-to-clean, continuous surface.
Phase 7: Sourcing Architectural Finishes and Specialty Surface Treatments

Selecting High-Performance Coatings for Heavy-Wear Concrete Slabs
Utility zones, home workshops, and garage spaces experience heavy physical impacts, vehicle loads, and chemical exposure that standard floor paints cannot withstand. For these demanding areas, resin-based surface systems deliver superior impact resistance and seamless durability.
Consulting reputable epoxy floor companies ensures the correct selection and application of multi-layer resin coatings tailored to your room’s specific usage demands. Professional applicators handle moisture mitigation primers, decorative flake distribution, and clear topcoat sealing, creating a chemical-resistant barrier that protects raw concrete from salt corrosion, oil stains, and mechanical wear.
Procuring Premium Paints and Architectural Supplies for Final Detailing
The final stage of any interior renovation involves tying together colors, wall textures, and trim accents to reflect your personal style. Achieving crisp line separation, uniform coverage, and long-lasting color fidelity depends as much on the quality of your paint and tools as it does on technique.
Before starting your painting project, visit a fully stocked paint supply store to select high-density micro-fiber rollers, professional-grade synthetic brushes, surface-specific primers, and low-tack painter’s tape. When choosing your paint formulas, visit a dedicated benjamin moore store to access premium, low-VOC architectural coatings and sample pots. Testing paint colors directly on your walls under both natural sunlight and artificial room lighting ensures your chosen color palette remains vibrant and harmonious throughout the day.
Renovating a home is a transformative journey that combines creative vision with practical engineering. By following a structured planning roadmap—defining a realistic scope, securing your building envelope against the elements, selecting durable floor materials, applying high-performance protective coatings, and finishing with premium paint systems—you eliminate guesswork and protect your financial investment.
Remember that a successful renovation is measured not just by the final visual outcome, but by the quality and care built into every layer along the way. With a clear design plan, realistic budgeting, and the support of skilled trade professionals and reliable product suppliers, you can execute your home remodel with total confidence, creating an inviting, functional, and enduring living space for years to come.
About the Author